
beginner free printable resistance band exercise chart pdf
Article Plan: Beginner Free Printable Resistance Band Exercise Chart PDF
Discover a comprehensive guide to utilizing resistance bands, offering accessible workouts and a free printable chart for beginners seeking effective strength training at home.
Resistance band training is gaining immense popularity as a convenient and effective method for building strength, improving flexibility, and enhancing overall fitness. Unlike traditional weightlifting, resistance bands offer a unique form of resistance that accommodates all fitness levels, making them particularly appealing to beginners. They are incredibly versatile, portable, and affordable, eliminating the need for expensive gym memberships or bulky equipment.
This guide will serve as your starting point for incorporating resistance bands into your fitness routine. We’ll explore the numerous benefits, different types of bands available, and how to choose the appropriate resistance level for your needs. We will also delve into finding a free printable resistance band exercise chart to help structure your workouts and track your progress. Whether you’re recovering from an injury, looking to supplement your current training, or simply starting your fitness journey, resistance bands provide a safe and effective way to achieve your goals.
What are Resistance Bands?
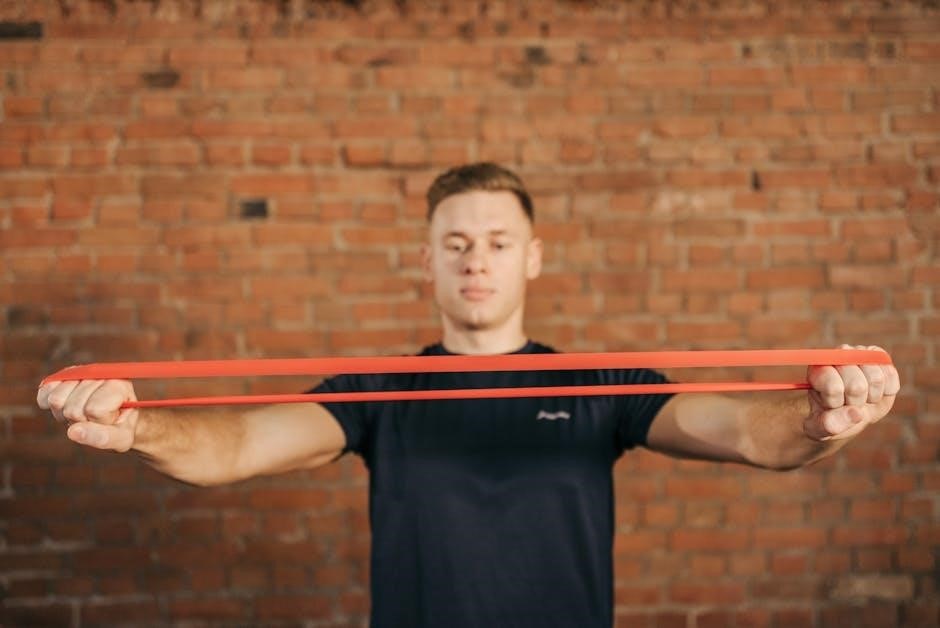
Resistance bands, often called exercise bands, are elastic bands used to build strength and add resistance to exercises. They come in a variety of materials, lengths, and resistance levels, offering a customizable workout experience. Unlike free weights, resistance bands provide variable resistance – the further you stretch the band, the greater the resistance becomes.
These bands are typically made from latex, rubber, or thermoplastic elastomers. They are color-coded to indicate different resistance levels, allowing users to progressively increase the challenge as they get stronger. Their lightweight and portable nature makes them ideal for home workouts, travel, or supplementing gym routines. They are a fantastic tool for physical therapy, rehabilitation, and general fitness, providing a low-impact way to strengthen muscles and improve mobility. Finding a free printable resistance band exercise chart will help you maximize their potential.
Benefits of Using Resistance Bands for Beginners
Resistance bands offer numerous advantages, especially for those new to strength training. They are incredibly versatile, suitable for all fitness levels and easily adaptable for various exercises. Their low-impact nature minimizes stress on joints, making them ideal for individuals recovering from injuries or with joint pain. Bands are also significantly more affordable and portable than traditional weights, allowing for convenient workouts anywhere.
Beginners will appreciate the accessibility and reduced intimidation factor compared to lifting heavy weights. Resistance bands help build foundational strength, improve muscle endurance, and enhance flexibility. Using a free printable resistance band exercise chart ensures proper form and a structured workout. They are a great way to introduce your body to resistance training, building confidence and preparing you for more advanced exercises.
Types of Resistance Bands
Resistance bands come in several varieties, each suited for different training goals. TheraBands, flat elastic bands, are commonly used for rehabilitation and lighter exercises, offering low resistance. Loop bands, or circle bands, are ideal for lower body work, like glute activation and lateral walks. Tube bands with handles provide a more traditional feel, mimicking weightlifting exercises for upper body and core.
Figure 8 bands offer a unique shape for versatile movements. Resistance levels are typically color-coded, from extra light to extra heavy, allowing progressive overload. When utilizing a free printable resistance band exercise chart, understanding these types is crucial for selecting the appropriate band for each exercise. Choosing the right band ensures effective workouts and prevents injury.
Understanding Resistance Levels
Resistance bands are typically color-coded to indicate their resistance level, making selection easier for users of all fitness levels. Extra light bands (yellow) are perfect for beginners or rehabilitation, focusing on form and muscle activation. Light bands (green) offer a slight increase in challenge, suitable for warm-ups and lighter exercises.
Medium bands (red) provide moderate resistance, ideal for building strength and endurance. Heavy bands (blue) are for more advanced users, targeting muscle hypertrophy. Extra heavy bands (black) offer maximum resistance for serious strength training. A free printable resistance band exercise chart often indicates the recommended resistance level for each exercise, ensuring safe and effective progression.
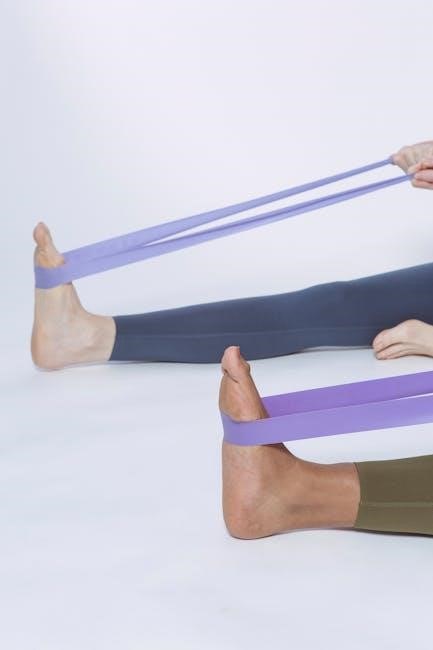
Finding a Free Printable Resistance Band Exercise Chart
Numerous online resources offer free printable resistance band exercise charts, catering to various fitness goals and experience levels. A quick internet search using keywords like “resistance band workout PDF” or “printable band exercises” yields many options. Pinterest is a treasure trove of visually appealing charts, categorized by muscle group or workout type.
Fitness websites and blogs frequently provide downloadable charts as lead magnets, requiring a simple email signup. Look for charts that clearly illustrate exercise form, include resistance level recommendations, and offer a variety of exercises. Ensure the chart is easy to read and understand, promoting safe and effective workouts. Downloading and printing a chart keeps exercises organized and accessible.
Essential Considerations Before Starting
Before embarking on a resistance band journey, assess your current fitness level and any pre-existing health conditions. Consulting a healthcare professional is advisable, especially if you have injuries or concerns. Proper form is paramount to prevent strains and maximize effectiveness; watch videos and understand the movements.
Start with lighter resistance bands and gradually increase intensity as strength improves. Ensure the bands are in good condition, free from cracks or tears. Clear a safe workout space, free of obstacles; Warm-up adequately before each session and cool down afterward; Listen to your body and stop if you experience pain.
Warm-up Exercises with Resistance Bands
Prepare your muscles for a resistance band workout with dynamic stretches using the bands themselves. Band Pull-Aparts, performed slowly, activate the upper back and shoulders. Lateral Band Walks gently warm up the glutes and legs. Arm Circles with a band provide mobility for the shoulders.
Band Rows, focusing on squeezing the shoulder blades, engage the back muscles. Light Band Bicep Curls and Tricep Extensions prepare the arms. Perform 10-15 repetitions of each exercise, focusing on controlled movements. Prioritize proper form over speed. A good warm-up increases blood flow and reduces the risk of injury, setting the stage for a productive workout.
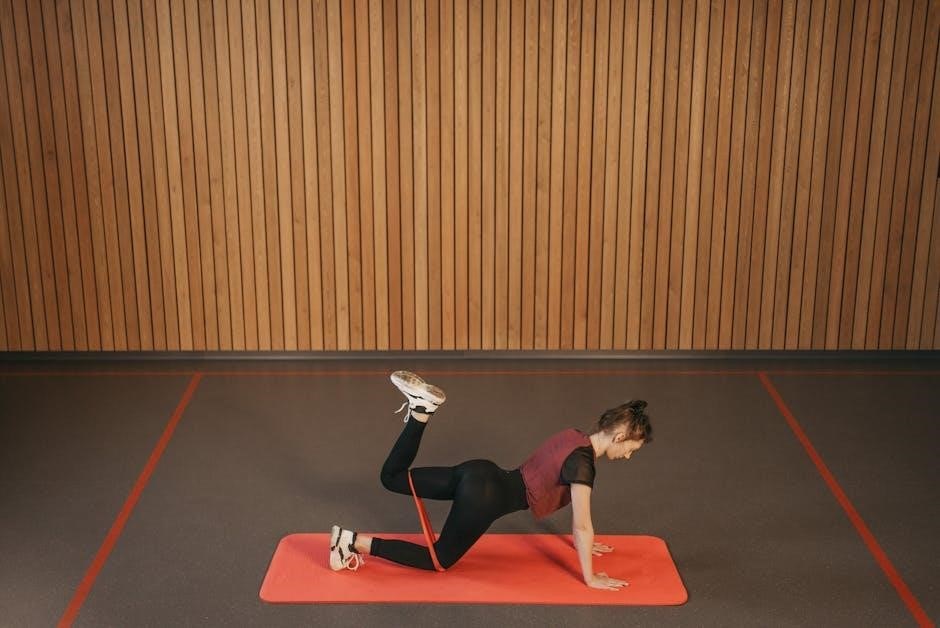
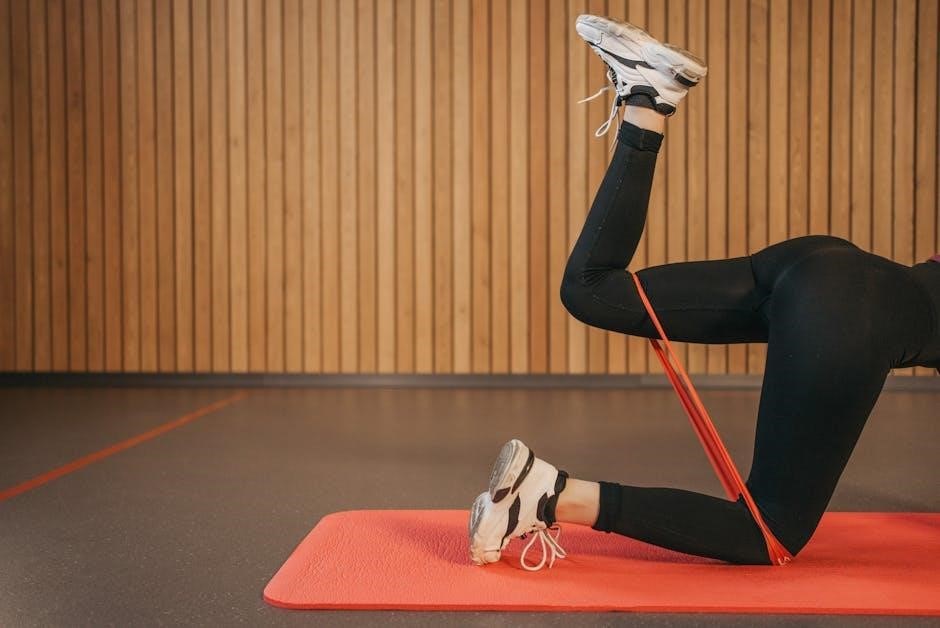
Lower Body Exercises
Target your legs and glutes with these effective resistance band exercises. Squats with a band around the thighs increase glute activation and challenge your stability. Glute Bridges, using a band above the knees, further isolate and strengthen the glutes. Lateral Walks, with the band around the ankles or thighs, work the outer thighs and hips.
Consider Banded Donkey Kicks for focused glute work. Perform 3 sets of 12-15 repetitions for each exercise. Focus on maintaining proper form throughout each movement – keep your core engaged and back straight. Adjust band resistance to match your fitness level. These exercises build lower body strength and improve overall stability.
Squats with Resistance Band
Place the resistance band around your thighs, just above your knees. Stand with feet shoulder-width apart, maintaining a slight bend in your knees. Engage your core and keep your back straight throughout the movement. Lower your hips as if sitting into a chair, ensuring your knees track in line with your toes.
Focus on pushing your knees outward against the band’s resistance during the squat. Maintain tension in the band throughout the entire exercise. Return to the starting position by squeezing your glutes and extending your legs. Perform 3 sets of 12-15 repetitions, adjusting band resistance as needed. This variation enhances glute activation and adds intensity to traditional squats.
Glute Bridges with Resistance Band
Position the resistance band around your thighs, slightly above your knees. Lie on your back with knees bent and feet flat on the floor, hip-width apart. Engage your core and squeeze your glutes as you lift your hips off the floor. Focus on driving through your heels and maintaining a straight line from your shoulders to your knees.
Keep the band taut by pushing your knees outward against the resistance. Hold the bridge position for a second at the top, maximizing glute contraction. Slowly lower your hips back to the starting position, controlling the movement. Complete 3 sets of 15-20 repetitions, adjusting band resistance for a challenging workout. This exercise effectively targets and strengthens the gluteal muscles.
Lateral Walks with Resistance Band
Place the resistance band around your ankles or just above your knees. Stand with your feet hip-width apart, knees slightly bent in a semi-squat position. Maintain a slight bend in your knees throughout the exercise. Keep your back straight and core engaged for stability.
Slowly step sideways, maintaining tension on the band. Take 10-15 steps in one direction, then repeat in the opposite direction. Focus on keeping your feet shoulder-width apart and avoiding letting your knees cave inward. Complete 3 sets of lateral walks, adjusting band resistance as needed. This exercise effectively targets the gluteus medius, improving hip stability and strength.
Upper Body Exercises
Resistance bands are surprisingly effective for sculpting and strengthening your upper body, offering a versatile alternative to traditional weights. These exercises are perfect for beginners, allowing you to build strength gradually and safely. Focus on controlled movements and proper form to maximize results and prevent injury.
We’ll explore foundational exercises like bicep curls, tricep extensions, and shoulder presses. Each exercise can be modified to suit different resistance levels, making it easy to progress as you get stronger. Remember to choose a band that provides a challenging yet manageable resistance, ensuring you maintain good form throughout each repetition. Consistent practice will lead to noticeable improvements in upper body strength and definition.

Bicep Curls with Resistance Band
Bicep curls with resistance bands are an excellent entry point into upper body strength training. To perform this exercise, stand on the middle of the band with feet shoulder-width apart, holding the handles with palms facing forward. Keep your elbows close to your sides throughout the movement.
Slowly curl the band upwards towards your shoulders, squeezing your biceps at the top of the movement. Control the descent back to the starting position, resisting the pull of the band. Aim for 10-12 repetitions for 3 sets. Focus on maintaining good form and a controlled tempo to maximize muscle engagement and prevent injury. Adjust the band resistance as needed to challenge yourself appropriately.
Tricep Extensions with Resistance Band
Targeting the back of your arms, resistance band tricep extensions are a fantastic way to build upper body strength. Secure the band under your feet, then grasp the other end with both hands, extending it overhead. Keep your elbows pointed towards the ceiling and close to your head.
Slowly bend your elbows, lowering the band behind your head while maintaining control. Extend your arms back to the starting position, focusing on squeezing your triceps. Complete 10-12 repetitions for 3 sets. Ensure a slow, controlled movement throughout the exercise. Adjust the band’s resistance to match your strength level, and prioritize proper form to avoid strain.
Shoulder Press with Resistance Band
Strengthen your shoulders and upper back with resistance band shoulder presses, a versatile exercise for all fitness levels. Stand on the middle of the resistance band with feet shoulder-width apart, holding the ends of the band in each hand. Keep your elbows bent at a 90-degree angle, palms facing forward.
Press the band straight overhead, extending your arms fully but avoiding locking your elbows. Slowly lower the band back to the starting position, maintaining control throughout the movement. Perform 10-12 repetitions for 3 sets. Choose a band resistance that challenges you while allowing for proper form. Focus on engaging your core for stability during the exercise.
Core Exercises
Strengthen your midsection and improve stability with resistance band core exercises. These movements enhance posture and overall functional fitness. Resistance Band Russian Twists involve sitting with knees bent, feet slightly elevated, and looping a band around your feet. Hold the band ends and twist your torso from side to side, engaging your obliques.
For Resistance Band Plank Variations, place a band around your wrists or ankles while in a plank position. This adds an extra challenge to the traditional plank, requiring greater core engagement. Perform 10-15 repetitions of each exercise for 3 sets, focusing on controlled movements and proper form. Remember to breathe deeply throughout each exercise.
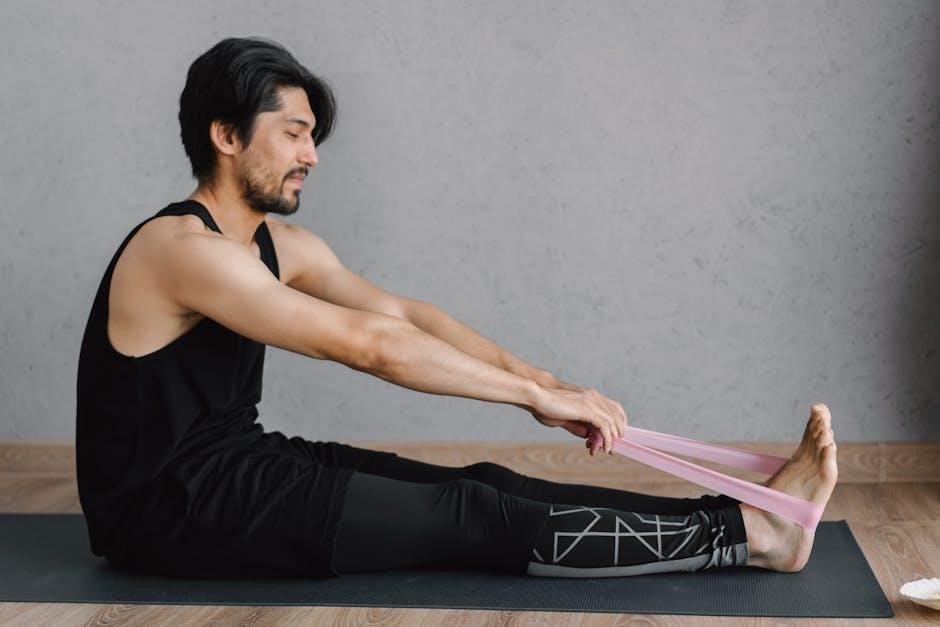
Resistance Band Russian Twists
Engage your obliques and core with Resistance Band Russian Twists, a fantastic exercise for rotational strength. Begin by sitting on the floor with your knees bent and feet either flat on the ground or slightly elevated for a greater challenge. Loop a resistance band around your feet, holding the ends securely in your hands.
Maintain a straight back and lean back slightly, keeping your core engaged throughout the movement. Twist your torso from side to side, bringing the band towards each side of your body. Focus on controlled movements, avoiding jerky motions. Aim for 15-20 repetitions per side, completing 3 sets with short rests in between.

Resistance Band Plank Variations
Elevate your plank routine with resistance band variations, intensifying core engagement and stability. Begin in a standard plank position, then loop a resistance band around your feet or thighs. For a lateral walk plank, maintain the plank while stepping one foot out to the side, followed by the other, keeping tension on the band.
Another variation involves placing the band just above your knees, resisting inward collapse during the plank. Focus on maintaining a straight line from head to heels, preventing hip sagging or lifting. Hold each variation for 30-60 seconds, completing 3 sets with brief rests. These additions challenge your core in new ways, building strength and endurance.
Cool-down and Stretching
Concluding your resistance band workout with a proper cool-down and stretching routine is crucial for muscle recovery and flexibility. Begin with 5-10 minutes of light cardio, like walking in place, to gradually lower your heart rate. Follow this with static stretches, holding each stretch for 20-30 seconds.

Focus on major muscle groups worked during the session – legs, arms, and core. Include stretches like hamstring stretches, quad stretches, tricep stretches, and torso twists. Resistance bands can even assist with stretching, providing gentle support and increased range of motion. Prioritizing cool-down prevents soreness and enhances long-term fitness gains.
Safety Precautions When Using Resistance Bands
Prioritize safety when incorporating resistance bands into your fitness routine. Always inspect bands for cracks, tears, or signs of wear before each use; discard damaged bands immediately. Secure the band properly, ensuring it’s firmly anchored to a stable object or under your feet. Avoid overstretching, as bands can snap, causing injury.
Maintain a controlled and slow movement throughout each exercise. Be mindful of your surroundings, ensuring sufficient space to prevent accidental contact with objects or people. If a band slips, stop the exercise immediately. Listen to your body and cease if you experience pain. Proper form is paramount to prevent strains or injuries.
Progressing Your Resistance Band Workouts
Gradually increase the challenge as your strength improves. Transition to heavier resistance bands, offering greater tension and difficulty. Increase repetitions, performing more reps per set to enhance muscular endurance. Add sets, expanding the total volume of your workout for continued progress.
Shorten rest periods between sets, intensifying the cardiovascular demand. Combine bands for increased resistance, layering multiple bands to amplify the challenge. Explore more complex exercises, incorporating multiple muscle groups simultaneously. Focus on controlled movements, maintaining proper form throughout the progression. Regularly reassess your fitness level and adjust accordingly.
Resources for Printable Charts
Numerous online platforms offer free printable resistance band exercise charts, catering to various fitness levels. Websites like Pinterest and fitness blogs host a wealth of downloadable resources, showcasing diverse workout routines. Search for “resistance band workout PDF” on Google to uncover a plethora of options. Explore fitness apps that generate personalized charts based on your goals.
Look for charts that clearly illustrate exercise form and target muscle groups. Consider charts categorized by fitness level – beginner, intermediate, or advanced. Download and print multiple charts to diversify your workouts. Utilize YouTube channels offering visual demonstrations alongside printable guides. Remember to prioritize charts from reputable sources, ensuring accuracy and safety.
Maintaining Your Resistance Bands
Proper care extends the lifespan of your resistance bands, ensuring consistent performance. After each use, wipe bands down with a damp cloth to remove sweat and dirt, preventing deterioration. Store bands in a cool, dark, and dry place, away from direct sunlight and extreme temperatures. Avoid storing them stretched or twisted, as this can weaken the latex.
Regularly inspect bands for cracks, tears, or signs of wear. Discard damaged bands immediately to prevent snapping during exercise. Consider using a protective powder, like talc, to prevent bands from sticking together. Avoid contact with oils, lotions, and harsh chemicals. Following these simple steps will keep your bands in optimal condition for countless workouts.
Troubleshooting Common Issues
Bands snapping? Ensure you’re using the correct resistance level and inspect bands for pre-existing damage. Bands rolling or bunching? Adjust your grip or consider bands with a thicker width. Skin irritation? Use a light layer of powder, like talc, to reduce friction. Difficulty maintaining tension? Shorten the band or adjust your body position.
Feeling no challenge? Progress to a higher resistance level or increase repetitions. Experiencing discomfort? Stop immediately and reassess your form. Bands sticking together? Store them separately and use powder. Remember, proper form is crucial; watch videos and consult resources if needed. Addressing these issues ensures a safe and effective workout.