self cleaning ge electric oven instructions
GE electric ovens feature a convenient self-cleaning cycle, providing an efficient way to maintain your appliance. This innovative feature uses high temperatures to burn food residue, leaving a dusty ash that’s easy to wipe away. The self-cleaning process not only saves time but also reduces the need for harsh chemicals, making it an eco-friendly option for modern kitchens.
1.1 What is a Self-Cleaning Oven?
A self-cleaning oven is a convenient appliance designed to simplify maintenance by eliminating the need for manual scrubbing. It uses high temperatures, typically between 800°F and 1000°F, to burn food residue into ash, which can then be easily wiped away. This feature is particularly useful for removing stubborn stains and grime that accumulate over time. The oven door locks during the cleaning cycle to ensure safety and contain heat. GE electric ovens with this feature are equipped with specialized interiors that withstand extreme temperatures, making the process efficient and eco-friendly. By reducing the need for harsh chemicals, self-cleaning ovens offer a healthier and more sustainable way to keep your oven pristine.
1.2 Benefits of a Self-Cleaning GE Electric Oven
A self-cleaning GE electric oven offers numerous benefits, making it a practical choice for home cooks. The primary advantage is the significant reduction in manual labor, as the high-temperature cleaning cycle eliminates the need for scrubbing. This feature also minimizes smoke and odors during cleaning, creating a safer and more pleasant kitchen environment. Additionally, self-cleaning ovens reduce the reliance on chemical cleaners, promoting a healthier and eco-friendly approach to maintenance. The process is energy-efficient, and the consistent cleaning helps maintain the oven’s performance and longevity. Overall, a self-cleaning GE oven provides convenience, efficiency, and long-term cost savings, making it a valuable asset for any household.
Preparing for Self-Cleaning
Before starting the self-cleaning cycle, remove racks and pans, lock the oven door, and clear large food debris to minimize smoke and ensure efficiency.
2.1 Removing Oven Racks and Pans
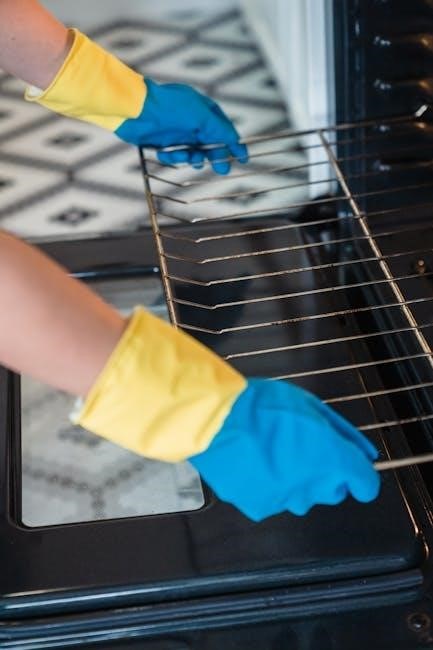
Before initiating the self-cleaning cycle, it is essential to remove all oven racks, pans, and utensils. This prevents damage to the racks and ensures an unobstructed cleaning process. Check your oven’s specific instructions to confirm if racks need to be removed entirely or if they can remain in a designated cleaning position. Properly storing these items outside the oven avoids any interference with the high-temperature cleaning cycle. Additionally, removing racks and pans helps prevent food residue from becoming embedded, making the cleaning process more efficient. Once removed, clean these items separately to avoid recontaminating the oven after the cycle completes.
2.2 Locking the Oven Door
Locking the oven door is a critical step before starting the self-cleaning cycle. This ensures safety by preventing accidental opening during the high-temperature cleaning process. For most GE electric ovens, the door will automatically lock once the self-clean cycle is activated. However, some models may require manual locking. Always refer to your specific oven’s instructions to confirm the locking mechanism. A locked door also helps maintain consistent heat levels, optimizing the cleaning efficiency. Once the cycle is complete and the oven has cooled, the door will unlock automatically or with a manual release, depending on the model. This feature ensures both safety and effectiveness during the self-cleaning process.
2.3 Clearing Large Food Debris
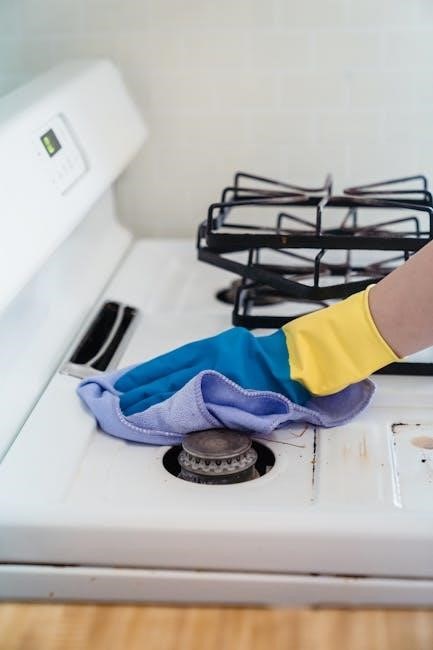
Before initiating the self-cleaning cycle, it’s essential to clear large food debris from the oven cavity. This step minimizes smoke and odors during the cleaning process. Use a damp cloth or paper towels to wipe away any loose or large food particles. Avoid using abrasive cleaners or scrubbers, as they may damage the oven’s interior. For tough spills, let them cool completely before attempting to remove them. Properly clearing debris ensures the self-cleaning cycle operates efficiently and effectively. This preliminary cleaning also helps prevent excessive smoke, making the process safer and more manageable. Always ensure the oven is cool before handling any debris to avoid burns or injuries.

Operating the Self-Cleaning Feature
Initiate the self-cleaning process by setting the oven to Clean mode. Select the recommended cycle duration based on soil level. The oven will lock and heat to high temperatures, burning food residue into ash. Monitor the cycle to ensure safety and efficiency. Once complete, let the oven cool before wiping away ash. This feature streamlines maintenance, leaving your oven clean and ready for use. Always follow manufacturer guidelines for optimal results and safety.
3.1 Setting the Oven to Clean Mode
To activate the self-cleaning feature on your GE electric oven, start by ensuring the oven is empty of racks, pans, and food debris. Locate the oven controls and turn the oven temperature knob to the “Clean” position. If your model doesn’t have a specific Clean setting, select a high temperature (usually 500°F or higher). Next, press the “Start” button to initiate the self-cleaning cycle. Some models may require additional steps, such as pressing a combination of buttons or confirming the selection on the digital display. Once activated, the oven door will automatically lock to ensure safety during the high-temperature cleaning process. Always refer to your specific model’s instructions for precise steps to avoid errors. This step is crucial for a successful and safe cleaning experience.
3.2 Selecting the Cleaning Cycle Duration
Selecting the appropriate cleaning cycle duration is essential for effective self-cleaning. GE electric ovens typically offer 2, 3, or 4-hour cleaning cycles, depending on the model and level of soiling. Light messes may require a 2-hour cycle, while heavily soiled ovens benefit from the longer 4-hour option. Refer to your oven’s control panel or manual to confirm available settings. Once the oven is in Clean Mode, use the digital controls or knobs to choose the desired duration. Ensure the oven door is locked before starting the cycle; The duration selection impacts both cleaning efficiency and energy use, so choose wisely based on your oven’s condition. Always follow the manufacturer’s guidelines for optimal results and safety. This step ensures a thorough cleaning tailored to your needs. Start the cycle once your selection is confirmed;
3.4 Understanding the Cleaning Process
The self-cleaning process in GE electric ovens uses high temperatures to reduce food residue to ash. During the cycle, the oven heats to approximately 800-900°F (427-482°C), burning away grease and grime. This process is noisy and may produce smoke, but it’s normal. Once the cycle completes, the oven cools, and the ash can be easily wiped away. Avoid opening the door during cleaning, as extreme heat can cause burns. After cooling, use a damp cloth to remove ash and any remaining residue. For tough spots, a mild cleanser may be needed. Clean racks separately and avoid using abrasive cleaners or scrubbers, as they can damage the finish; Regular use of this feature keeps your oven in excellent condition. Always follow safety guidelines during and after the cleaning process.
Safety Precautions During Self-Cleaning
Ensure the oven door is locked, and keep children away. Ventilate the area to reduce smoke and odors. Never open the door during cleaning, as extreme heat can cause burns. Monitor for fire signs and have a fire extinguisher nearby. Avoid using water to stop oven fires; smothering or turning off the oven is safer. Always follow the manufacturer’s guidelines to ensure a safe and effective cleaning process.
4.1 Preventing Accidental Opening
Preventing accidental opening during the self-cleaning cycle is crucial for safety. Most GE ovens feature an automatic locking mechanism that engages once the cycle starts. This ensures the door remains securely closed throughout the process. If your model has a manual latch, ensure it is tightly closed and consider using the latch lock if available. Additionally, keep children and pets away from the oven during cleaning. Never attempt to force the door open, as this can cause injury or damage. Always wait for the cycle to complete and the oven to cool down before unlatching the door. Proper locking prevents accidents and ensures effective cleaning.
4.2 Managing Smoke and Odors
During the self-cleaning cycle, high temperatures can generate smoke and strong odors from burning food residue. To manage this, ensure your kitchen is well-ventilated by opening windows or using exhaust fans. Minimize smoke by clearing large debris before starting the cycle. For lingering odors post-cleaning, place a heat-resistant bowl of water mixed with lemon juice or vinegar inside the oven during the final cooling phase. This helps neutralize smells naturally. Always prioritize safety by avoiding inhalation of fumes; keep the area ventilated and consider using an air purifier. Proper ventilation and natural odor solutions enhance comfort and efficiency during the cleaning process. This approach ensures a safer and fresher kitchen environment after using the self-cleaning feature.
4.3 Fire Safety Tips
Fire safety is crucial when using the self-cleaning feature on your GE electric oven. Always keep the oven door closed during the cycle to prevent flames from escaping. If a fire occurs, never open the door; instead, turn off the oven and let it cool. For small flames, closing the door will smother the fire. Keep a fire extinguisher nearby, rated for grease and electrical fires. Never use water to extinguish an oven fire, as it can cause splattering. Ensure proper ventilation to prevent smoke buildup, which can ignite. Regularly cleaning food debris reduces fire risks. Follow these precautions to ensure a safe self-cleaning process and protect your kitchen from potential hazards.
Post-Cleaning Maintenance
After the self-cleaning cycle, let the oven cool completely before wiping down the interior with a damp cloth to remove ash. Dispose of ashes safely, and clean the oven door and windows with a gentle cleaner for a spotless finish.
5.1 Wiping Down the Oven Interior
After the self-cleaning cycle, allow the oven to cool completely to avoid burns or damage. Use a damp cloth or sponge to wipe down the interior, removing any ash or residue. For stubborn spots, a soft-bristle brush or non-abrasive scrubber can be used. Avoid using harsh chemicals or abrasive materials, as they may damage the oven’s finish. Pay particular attention to the oven floor, walls, and ceiling, ensuring all ash is removed. If desired, a gentle cleaning product can be applied to tackle any remaining grime. Once wiped clean, use a dry cloth to remove excess moisture. This step ensures a sparkling oven interior and prevents dust from accumulating on the surfaces. Regular wiping helps maintain hygiene and efficiency for future use.
5.2 Disposing of Ashes Safely
Once the self-cleaning cycle is complete, let the oven cool entirely before handling any ashes; Use a damp cloth or sponge to gather the ash, ensuring it doesn’t become airborne. Place the ash in a sealed container or plastic bag to prevent spreading. Dispose of it in your regular trash, unless local regulations classify it as hazardous waste. Avoid inhaling the ash, as it may contain harmful particles. If any ash spills during cleanup, sweep or vacuum the area carefully to prevent residue from spreading. Always wear gloves and wash your hands thoroughly after handling ashes. Proper disposal ensures safety and prevents environmental contamination.
5.3 Cleaning the Oven Door and Windows
After the self-cleaning cycle, clean the oven door and windows for a sparkling finish. Use a mild detergent mixed with warm water and a soft cloth or sponge to wipe down the surfaces. Avoid harsh chemicals or abrasive scrubbers, as they may scratch the glass. For tougher residue, apply a mixture of equal parts water and white vinegar, let it sit for 10 minutes, then scrub gently. Remove any racks or shelves before cleaning for better access. Dry the surfaces thoroughly with a clean towel to prevent water spots. Regular cleaning maintains visibility and ensures even cooking performance. Always follow GE’s specific guidelines for your oven model to avoid damage.
Troubleshooting Common Issues
If the oven latch doesn’t lock, ensure proper alignment and consult the manual. For error codes, refer to the user guide for specific solutions. Excessive smoke may indicate improper food debris removal or vent blockage.
6.1 Oven Latch Not Locking
If the oven latch fails to lock during the self-cleaning cycle, ensure the door is properly aligned and free from obstructions. Check for food residue or debris that might block the latch. If the issue persists, consult your GE oven’s manual for specific troubleshooting steps. Some models require manual activation of the latch before the self-cleaning process. If the problem continues, contact GE customer support or a certified technician for assistance. Proper latch function is essential for safety and effective cleaning.
6.2 Error Codes During Self-Cleaning
Error codes during the self-cleaning cycle can indicate specific issues with your GE electric oven. Codes like “E1” or “E2” often relate to temperature sensors or electronic control malfunctions. If an error code appears, pause the cleaning process and refer to your oven’s user manual for code definitions. Common causes include faulty sensors, incorrect settings, or power interruptions. Restarting the oven or resetting the circuit breaker may resolve the issue. If the problem persists, contact GE customer support or a professional technician. Always consult the manual for model-specific guidance, as error codes can vary between oven models. Addressing these errors promptly ensures safe and effective operation of your self-cleaning feature.
6.3 Smoke or Fumes During Cleaning
Smoke or fumes during the self-cleaning cycle can occur due to burning food residue. To manage this, ensure proper ventilation by opening windows or turning on an exhaust fan. If smoke is excessive, temporarily pause the cycle and let the oven cool slightly. Never use water to extinguish oven fires, as it can cause damage. Instead, close the oven door to starve the flames of oxygen. If the smoke persists, check for large food particles that may not have been cleared before starting the cycle. Preventive measures, such as removing big debris beforehand, can minimize smoke. If the issue continues, consult your GE oven’s manual or contact customer support for assistance.

Eco-Friendly Aspects of Self-Cleaning Ovens
Self-cleaning GE ovens reduce chemical use and energy waste, promoting eco-friendly maintenance. The high-heat cycle minimizes water and detergent needs, making it a sustainable cleaning option.
7.1 Energy Efficiency During Cleaning
Self-cleaning GE electric ovens are designed to optimize energy use during the cleaning cycle. The high-heat process efficiently burns away food residue, reducing the need for prolonged preheating or multiple cleaning sessions. This method minimizes energy consumption compared to traditional manual cleaning, which often requires repeated scrubbing and heating. Additionally, the oven’s insulation is engineered to retain heat, ensuring the cleaning process is both effective and energy-efficient. By reducing the frequency of deep cleans, self-cleaning ovens contribute to lower overall energy usage over time. This eco-conscious design makes self-cleaning ovens a practical choice for environmentally aware homeowners.
7.2 Reducing Chemical Use
The self-cleaning feature of GE electric ovens significantly reduces the need for harsh chemical cleaners. Unlike traditional cleaning methods that rely on strong detergents, the high-heat cycle breaks down food residue naturally. This eliminates the requirement for abrasive chemicals, creating a safer environment for both the oven and the household. Without chemical cleaners, there’s no risk of toxic fumes or residue left behind. This eco-friendly approach aligns with sustainable living practices, promoting a healthier kitchen environment. By utilizing heat instead of chemicals, GE ovens offer a cleaner, greener alternative for maintaining oven hygiene without compromising on effectiveness.
7.3 Environmental Benefits
The self-cleaning feature of GE electric ovens offers significant environmental benefits. By eliminating the need for harsh chemical cleaners, it reduces the release of toxic substances into the environment, promoting a healthier ecosystem. The high-heat process is more energy-efficient compared to traditional cleaning methods that require multiple cycles of heating and scrubbing. Additionally, water usage is minimized since the process doesn’t involve extensive rinsing. Regular use of the self-cleaning function can extend the oven’s lifespan by preventing food residue buildup, thus reducing the need for frequent replacements and associated electronic waste. This approach aligns with sustainability goals, lowering carbon footprints and reducing landfill contributions. It encourages responsible energy use and supports eco-conscious lifestyles, making GE ovens a greener choice for kitchens.
User Experiences and Tips
Users praise the convenience of GE’s self-cleaning ovens, sharing tips like running cycles during low-usage times to minimize disruptions. Light smoke is normal, but ensure good ventilation. Always follow manual guidelines for optimal results and safety.
8.1 First-Time User Experiences
First-time users of GE self-cleaning ovens often find the process straightforward but may encounter minor challenges. Many report satisfaction with how the high heat effectively breaks down food residue. However, some note that the strong smell and smoke during the cycle can be overwhelming if proper ventilation isn’t ensured. A few users mention initial confusion about the latch mechanism, which must be securely locked to start the cycle. Despite these minor hiccups, most agree the self-cleaning feature saves time and effort compared to manual cleaning. For the best experience, it’s recommended to follow the manual closely and prepare for potential odors by opening windows.
8.2 Tips for Optimal Cleaning Results
For optimal cleaning results in your GE self-cleaning oven, follow these essential tips. Always remove racks and pans before starting the cycle, as they can obstruct airflow and reduce efficiency. Clean the oven when it’s warm, as this helps loosen food residue. Avoid using abrasive cleaners or scrubbers, as they can damage the interior finish. Lightly wipe spills immediately after cooking to prevent tough stains from forming. Ensure the oven door is securely locked during the cycle to allow proper heat distribution. Open windows for ventilation to manage smoke and odors. After the cycle, let the oven cool before wiping away ash with a damp cloth. Regular maintenance and timely cleaning will keep your oven in pristine condition and enhance its performance.
8.3 Common Mistakes to Avoid
- Not removing racks and pans: They can obstruct airflow and get damaged by high heat.
- Forgetting to lock the oven door: This can lead to accidental opening during the cycle.
- Leaving large food debris: It causes excessive smoke and odors.
- Poor ventilation: Failing to open windows can lead to smoke filling the kitchen.
- Interrupting the cycle: This can leave the oven in a dangerous state.
- Not letting the oven cool: Opening too soon can release harmful fumes.
- Using abrasive cleaners post-cycle: They can damage the oven’s interior.
GE self-cleaning ovens offer efficiency, convenience, and eco-friendly cleaning. Regular use of the feature ensures a well-maintained appliance, reducing manual effort and chemical use. Follow instructions carefully for optimal results and a safe, hassle-free experience. Your GE oven will remain in excellent condition with proper care.
9.1 Summary of Self-Cleaning Instructions
Using the self-cleaning feature on your GE electric oven involves several key steps to ensure safety and effectiveness. First, remove all racks and pans from the oven to prevent any interference during the cleaning cycle. Next, lock the oven door to avoid accidental opening while it’s in use. Clear any large food debris to minimize smoke production. Set the oven to the self-cleaning mode, typically by selecting the appropriate option on the control panel, and choose the recommended duration for the cleaning cycle. Allow the oven to heat to a high temperature, which will burn food residue into ash. This process usually takes several hours, so plan accordingly. During cleaning, keep the kitchen well-ventilated to manage any fumes. Once the cycle is complete and the oven has cooled, wipe down the interior with a damp cloth to remove the ash. Ensure the oven has cooled completely before attempting to open the door or clean it manually. By following these steps, you can efficiently and safely clean your GE electric oven using its self-cleaning feature.
9.2 Importance of Regular Maintenance
Regular maintenance is crucial for ensuring the optimal performance and longevity of your GE electric oven. By adhering to a consistent cleaning schedule, you can prevent the buildup of stubborn food residue, which can interfere with the self-cleaning feature. Over time, neglecting maintenance may lead to wear and tear on the oven’s components, such as the heating elements or door seals. Additionally, regular upkeep helps maintain energy efficiency and ensures the oven operates safely. Simple tasks, like wiping down the oven after use and addressing minor spills promptly, can significantly reduce the need for deep cleaning. Consistent care also prevents unpleasant odors and ensures a hygienic cooking environment. By prioritizing maintenance, you extend the lifespan of your oven and keep it functioning at its best.
9.3 Final Thoughts on GE Self-Cleaning Ovens
GE self-cleaning electric ovens offer a convenient and efficient way to maintain a pristine cooking environment. By utilizing high heat to eliminate food residue, these ovens save time and reduce the need for harsh chemicals. Regular use of the self-cleaning feature ensures optimal performance and extends the oven’s lifespan. Safety features, such as the locking mechanism, provide peace of mind during the cleaning process. For best results, always follow the manufacturer’s instructions and take advantage of GE’s customer support for any troubleshooting needs. With proper care, your GE oven will remain a reliable and durable addition to your kitchen for years to come.
Additional Resources
For further assistance, refer to GE’s official website for detailed manuals, video tutorials, and customer support contact information to address any self-cleaning oven inquiries.
10.1 Manufacturer Guidelines
GE provides detailed instructions and guidelines for the self-cleaning feature in their electric ovens. These can be found in the official GE Appliances website or in the oven’s user manual. The guidelines outline specific steps for preparing the oven, operating the self-clean cycle, and ensuring safety. They also include model-specific instructions, troubleshooting tips, and maintenance recommendations. Always refer to these official resources for accurate and reliable information tailored to your oven model. Additionally, GE offers customer support through their website and hotline for any queries or issues related to the self-cleaning process. Following these guidelines ensures optimal performance, safety, and longevity of your GE electric oven.
10.2 Online Tutorials and Videos
Online tutorials and videos provide visual guidance for using the self-cleaning feature on GE electric ovens. GE’s official website and YouTube channel offer step-by-step videos demonstrating the process. These resources cover topics like preparing the oven, setting the cleaning cycle, and post-cleaning maintenance. Many tutorials also include tips for achieving optimal results, such as removing racks before cleaning and managing smoke. Additionally, third-party channels and forums share user experiences and troubleshooting advice; These videos are particularly helpful for first-time users, offering a clear understanding of the self-cleaning process. By following these guides, users can ensure a safe and effective cleaning experience for their GE electric ovens.
10.3 Customer Support Contact Information
For assistance with your GE electric oven’s self-cleaning feature, GE Appliances offers comprehensive customer support. You can reach their customer service team by calling 1-800-626-2002 or through live chat on their official website. Additionally, support is available via email by visiting the GE Appliances website and submitting a request form. The website also provides access to FAQs, user manuals, and troubleshooting guides specific to your oven model. For immediate help, the GE Appliances website is a valuable resource, offering detailed instructions and solutions for common issues. Always have your oven’s model number ready when contacting support for faster assistance.