
singer e99670 user manual
Welcome to the Singer E99670 User Manual! This comprehensive guide provides detailed instructions to help you master your sewing machine‚ ensuring safety‚ creativity‚ and optimal performance.
1.1 Overview of the Singer E99670 Sewing Machine
The Singer E99670 sewing machine is a versatile and user-friendly appliance designed to meet the needs of both beginners and experienced sewists. With its advanced electronic controls and wide range of stitch options‚ it offers unparalleled creativity and precision. The machine is equipped with features like automatic needle threading‚ adjustable stitch length and width‚ and a variety of presser feet for different fabrics and techniques. Its compact design makes it ideal for household use‚ while its robust construction ensures durability. The Singer E99670 is built to deliver high-quality results‚ making it a perfect choice for crafting‚ quilting‚ and everyday sewing projects. Its ease of operation and extensive capabilities ensure a seamless sewing experience for all users.
1.2 Importance of Reading the User Manual
Reading the Singer E99670 user manual is essential for safe and effective operation of your sewing machine. It provides detailed guidance on setup‚ maintenance‚ and troubleshooting‚ ensuring optimal performance. The manual highlights safety precautions to prevent accidents and explains how to use advanced features like electronic controls and customizable stitch patterns. By understanding the machine’s capabilities and proper care techniques‚ you can avoid common issues and extend its lifespan. Whether you’re a beginner or an experienced user‚ the manual offers valuable insights to enhance your sewing experience and unleash your creativity. Taking the time to read it thoroughly will help you master your Singer E99670 and achieve professional-quality results in every project.
Safety Precautions
Always follow safety guidelines to prevent accidents. Keep children away‚ unplug after use‚ avoid damaged cords‚ and never operate near water or flammable materials.
2.1 General Safety Instructions
Always prioritize safety when using the Singer E99670 sewing machine. Read all instructions carefully before use. Keep children away and avoid unattended operation. Never use the machine near water or in humid environments. Ensure proper ventilation and avoid blocking air openings. Use only recommended attachments and avoid damaged cords or plugs. Turn off the machine when making adjustments or cleaning. Keep fingers away from moving parts‚ especially the needle area. Never insert objects into openings or operate the machine if damaged. Follow these guidelines to ensure safe and efficient sewing experiences.
2.2 Specific Warnings and Cautions
Adhere to specific warnings to ensure safe operation of the Singer E99670. Never leave the machine unattended while plugged in or use it near water. Avoid operating it in humid environments or with damaged cords. Keep children away‚ as the machine is not a toy. Use only Singer-recommended attachments to prevent malfunctions. Never touch moving parts‚ especially the needle area‚ and avoid inserting objects into openings. Turn off the machine before cleaning or making adjustments. Properly unplug by grasping the plug‚ not the cord. Ensure ventilation openings are clear of lint and debris. Follow these cautions to prevent accidents and maintain optimal performance.
2.3 Handling Electrical Components Safely
Handling electrical components of the Singer E99670 requires utmost care. Always unplug the machine before cleaning‚ lubricating‚ or servicing. Avoid using damaged cords or plugs‚ as they pose severe safety risks. Never operate the machine in wet conditions or near water sources. Ensure all electrical parts are dry before use. When replacing bulbs‚ disconnect the power and use only the specified wattage to prevent overheating. Never attempt repairs on electrical components yourself; consult authorized service centers instead. Keep the power cord away from heated surfaces and sharp objects. Proper handling ensures your safety and prolongs the machine’s lifespan. Follow these guidelines to maintain a safe and efficient sewing environment.
2.4 Maintenance and Storage Guidelines
Regular maintenance is crucial for the longevity of your Singer E99670 sewing machine. Clean the machine thoroughly after use‚ removing lint and dust from the bobbin area‚ feed dogs‚ and tension discs. Lubricate moving parts as recommended to ensure smooth operation. Store the machine in a dry‚ cool place‚ away from direct sunlight and moisture. Use a protective cover to shield it from dust. Avoid exposing the machine to extreme temperatures or humidity. For storage‚ ensure the machine is unplugged and all accessories are securely packed. Regularly check for dust accumulation and clean as needed. Proper maintenance and storage will keep your Singer E99670 in optimal condition for years of reliable service.
Features of the Singer E99670 Sewing Machine
The Singer E99670 boasts advanced electronic controls‚ 100 built-in stitches‚ and customizable settings. It includes various presser feet and accessories‚ enhancing versatility for both basic and complex sewing projects.
3.1 Mechanical and Electronic Features
The Singer E99670 combines robust mechanical components with advanced electronic controls‚ offering precision and versatility. It features an automatic needle threader‚ a top-loading bobbin system‚ and a large LCD display for easy stitch selection. The machine includes 100 built-in stitches‚ ranging from basic to decorative‚ and allows for customization of stitch length and width. Electronic controls enable smooth operation‚ while the heavy-duty metal frame ensures durability and stability. Additional features like a free-arm design and adjustable presser foot pressure further enhance its capability to handle various fabrics and sewing techniques effectively.
3.2 Included Accessories and Attachments
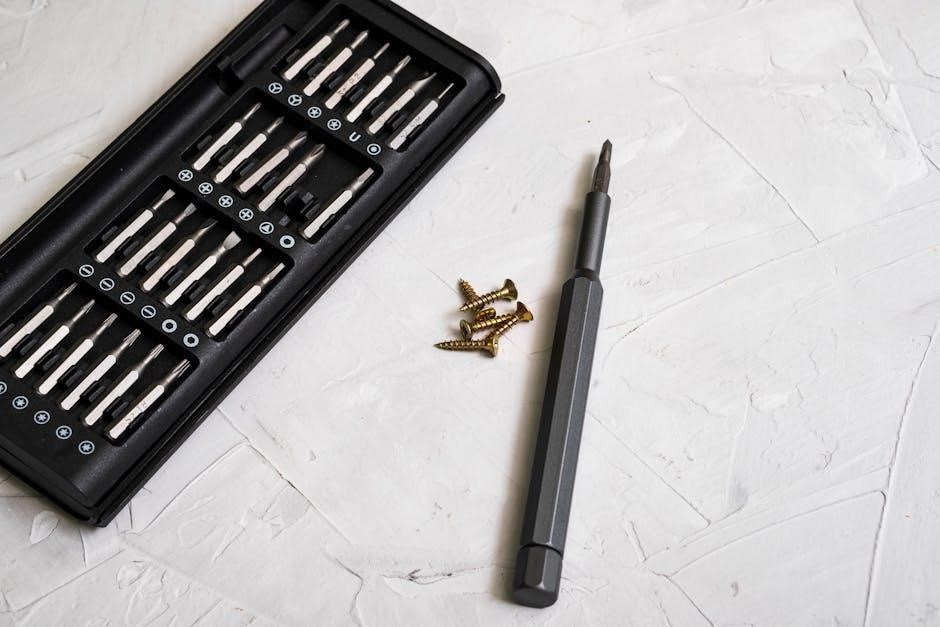
The Singer E99670 sewing machine comes with a variety of accessories to enhance your sewing experience. Included are multiple presser feet‚ such as the zipper foot‚ buttonhole foot‚ and blind hem foot‚ designed for specific tasks. You’ll also find bobbins‚ a pack of needles‚ a seam ripper‚ and a screwdriver for adjustments. Additional accessories include a dust cover to protect your machine and spool pins for managing thread. These attachments and tools are carefully selected to handle diverse fabrics and sewing projects‚ ensuring versatility and convenience. The comprehensive set of accessories allows you to tackle various sewing tasks with ease and precision‚ making the Singer E99670 a versatile choice for both beginners and experienced sewists.
3.3 Customization Options for Stitch Patterns
The Singer E99670 offers extensive customization options for stitch patterns‚ allowing you to tailor your sewing projects with precision. With electronic controls‚ you can easily adjust stitch length‚ width‚ and density to suit various fabrics and techniques. The machine also features a memory function‚ enabling you to save custom stitch combinations for future use. Additionally‚ the E99670 includes a wide range of pre-programmed stitches‚ from basic straight and zigzag stitches to decorative and embroidery patterns. This versatility makes it ideal for creating personalized garments‚ home decor‚ and craft projects. Whether you’re embroidering intricate designs or quilting large fabrics‚ the Singer E99670 provides the tools to bring your creative visions to life with ease and professionalism.

Threading and Setup
Master the step-by-step guide to threading your Singer E99670 sewing machine and winding the bobbin. Proper setup ensures smooth operation and optimal stitching quality for all projects.
4.1 Step-by-Step Guide to Threading the Machine
Turn off and unplug the Singer E99670 sewing machine for safety. Locate the spool pin on top of the machine and place the thread on it. Gently pull the thread through the tension disc‚ ensuring it clicks into place.
Guide the thread down toward the take-up lever‚ moving it from left to right to ensure proper alignment. Continue threading through the channel and around the machine’s metal guide.
Insert the thread into the needle’s eye from front to back. Pull gently to secure it. Use the thread cutter to trim excess thread close to the needle.
Double-check that the thread is seated correctly in all guides and not tangled. Turn the machine on and test by sewing a few stitches to ensure smooth operation. Proper threading is essential for consistent stitching quality and to prevent common issues like thread breakage. Follow these steps carefully for optimal performance. Always refer to your Singer E99670 manual for visual guidance if needed.
4.2 Winding and Installing the Bobbin
Begin by turning off and unplugging your Singer E99670 sewing machine for safety. Locate an empty bobbin and place it on the bobbin winder located on the side of the machine.
Thread the machine by guiding the thread through the tension disc and around the take-up lever‚ moving it from left to right to ensure proper alignment.
Wind the thread onto the bobbin by turning the handwheel. Once the bobbin is sufficiently wound‚ trim the excess thread close to the bobbin.
Remove the bobbin from the winder and insert it into the bobbin case‚ ensuring the thread is gently pulled to seat it properly.
Place the bobbin case into the machine’s bobbin compartment and close the cover. Test the machine by sewing a few stitches to ensure the bobbin is installed correctly and functioning smoothly.
Properly winding and installing the bobbin is crucial for maintaining consistent stitch quality and preventing issues like thread breakage. Always refer to your Singer E99670 manual for visual guidance if needed.
Selecting and Using Stitch Patterns
The Singer E99670 offers a variety of stitch patterns for different fabrics. Choose the appropriate stitch based on fabric type‚ adjust settings‚ and customize patterns for optimal results.
5.1 How to Choose the Right Stitch for Your Fabric
Selecting the right stitch for your fabric is crucial for achieving professional results. The Singer E99670 offers various stitches‚ including straight‚ zigzag‚ and decorative options. Start by identifying your fabric type—delicate fabrics like silk require finer stitches‚ while heavier materials like denim benefit from stronger‚ straight stitches. Consider the project’s purpose: zigzag stitches are ideal for stretchy fabrics‚ while decorative stitches add elegance to home decor. Always test stitches on scrap fabric to ensure compatibility. Adjust stitch length and width as needed for optimal results. Proper thread selection and tension settings also play a key role in ensuring smooth stitching. Experiment and refer to the manual for specific recommendations tailored to your fabric and project needs.
5.2 Adjusting Stitch Length and Width
Adjusting stitch length and width on the Singer E99670 is straightforward‚ allowing you to customize your sewing experience. Use the electronic controls to modify settings‚ with the LCD screen displaying current values. Start by selecting your desired stitch type‚ then use the stitch length dial or buttons to adjust between 0-7mm. Similarly‚ adjust the stitch width using the designated control‚ typically ranging from 0-5mm. Fine-tune these settings based on fabric thickness and project requirements. For delicate fabrics‚ shorter lengths and narrower widths are ideal‚ while heavier materials may require longer‚ wider stitches. Always test adjustments on scrap fabric to ensure optimal results before sewing your final project. This feature ensures precision and versatility for various sewing tasks.
5.3 Customizing Stitch Patterns for Specific Projects
Customizing stitch patterns on the Singer E99670 allows you to tailor your sewing to specific projects. Use the LCD screen to preview and select from over 600 built-in stitches‚ including decorative‚ stretch‚ and heirloom options. For personalized touches‚ modify stitch patterns by adjusting length‚ width‚ and density using the electronic controls. Save custom settings for quick access in future projects. Experiment with combining different stitches for unique designs‚ such as blending decorative motifs with utility stitches. For heavy fabrics‚ choose robust stretch stitches‚ while delicate materials benefit from finer‚ more intricate patterns. The machine also supports importing custom stitch designs via USB‚ expanding your creative possibilities. Always test custom stitches on scrap fabric to ensure desired results before sewing on your final project. This feature enhances versatility‚ making the Singer E99670 ideal for diverse sewing needs.
Troubleshooting Common Issues
This section helps identify and resolve common issues like thread breakage and poor stitch quality‚ offering practical solutions to mechanical problems and ensuring smooth operation.
6.1 Identifying and Resolving Thread Breakage
Thread breakage is a common issue that can disrupt your sewing projects. To resolve this‚ start by checking the thread quality and ensuring it is suitable for your fabric. Proper thread tension is crucial; refer to the manual for adjustments. Inspect the needle for damage or dullness‚ as a faulty needle can cause frequent breaks. Clean the machine regularly‚ especially the tension discs and bobbin area‚ to remove lint and debris. If the issue persists‚ verify that the bobbin is correctly installed and that the upper thread is properly threaded. Avoid using low-quality threads‚ as they are more prone to breakage. By addressing these factors‚ you can minimize thread breakage and maintain smooth stitching.
6.2 Fixing Issues with Stitch Quality
Poor stitch quality can be frustrating‚ but it is often easy to resolve. Start by checking the thread tension‚ as uneven tension is a common cause of inconsistent stitches. Adjust the upper and bobbin thread tension according to the manual. Ensure the needle is in good condition and suitable for your fabric type. Dull or damaged needles can lead to skipped stitches or uneven stitching. Verify that the fabric is properly aligned and guided smoothly during sewing. If issues persist‚ clean the machine to remove lint and debris‚ which can interfere with stitch formation. Refer to the manual for specific guidance on adjusting settings for different fabrics and stitch patterns to achieve optimal results.
6.3 Solving Common Mechanical Problems
If your Singer E99670 sewing machine experiences mechanical issues‚ start by checking the power supply and ensuring the machine is properly plugged in. If the machine does not turn on‚ verify the outlet is functioning. For abnormal noises or vibrations‚ inspect for loose parts or debris. Regularly clean the interior to remove lint and dust‚ which can cause mechanical friction. Lubricate moving parts as recommended in the manual to maintain smooth operation. If the machine jams‚ stop immediately and gently remove any tangled thread or fabric. Avoid forcing parts‚ as this can cause further damage. Ensure the needle and presser foot are correctly installed and suitable for your project. If issues persist‚ consult the troubleshooting section or contact Singer customer support for assistance.

Maintenance and Cleaning
Regularly clean the machine by removing lint and dust from the interior. Lubricate moving parts as instructed to ensure smooth operation and longevity of the machine.
7.1 Regular Cleaning and Lubrication
Regular cleaning and lubrication are essential for maintaining the Singer E99670. Turn off and unplug the machine before cleaning. Use a soft brush to remove lint and debris from the bobbin area‚ feed dogs‚ and interior. Avoid using harsh chemicals or wet cloths‚ as they may damage components. Lubricate moving parts with a few drops of sewing machine oil‚ following the manual’s guidelines. Proper maintenance ensures smooth operation and prevents mechanical issues. Regularly checking and cleaning the machine will extend its lifespan and keep it functioning optimally for years to come.
7.2 Checking and Replacing Parts
Regularly inspect the Singer E99670 for worn or damaged parts. Check the needle‚ bobbin‚ and presser foot for signs of wear. Replace the needle frequently‚ as a dull or bent needle can cause poor stitch quality. If the bobbin case or hook assembly shows damage‚ refer to the manual for replacement instructions. Lubricate moving parts periodically to ensure smooth operation. Always unplug the machine before performing any maintenance. Use only genuine Singer replacement parts to maintain performance and warranty validity. Properly align and secure new parts to avoid misalignment issues. Consult the manual for specific guidance on checking and replacing components to ensure your machine runs efficiently and reliably. Regular inspections help prevent unexpected breakdowns and extend the machine’s lifespan.
Tips for Beginners
Start with straight-line stitching to get comfortable. Use the right fabric for practice. Keep the workspace clean and well-lit. Take small steps and follow the manual guide.
8.1 Getting Started with Your First Project
Welcome to your first sewing project with the Singer E99670! Start by unpacking and inspecting your machine to ensure all accessories are included. Read the manual thoroughly to understand basic operations. Begin by setting up your workspace with a flat‚ stable surface and good lighting. Practice threading the machine and winding the bobbin as outlined in the manual; Start with a simple project‚ like a straight-line stitch on scrap fabric‚ to get familiar with the controls. Use the included accessories‚ such as the all-purpose foot‚ for basic stitching. Keep your first project small‚ like a cloth pouch or a straight-seam fabric strip‚ to build confidence. Remember to take your time and refer to the manual for guidance on adjusting stitch length and width.
8.2 Understanding Basic Sewing Techniques
Mastering basic sewing techniques is essential for a smooth experience with your Singer E99670. Start by learning proper threading and bobbin winding to ensure even stitching. Practice selecting the right stitch type for your fabric‚ such as straight stitches for woven fabrics or zigzag for stretchy materials. Understand how to adjust stitch length and width to suit your project needs. Familiarize yourself with basic machine controls and presser feet for different tasks. Always use the correct needle type and keep fabric steady while sewing. These foundational skills will help you tackle projects confidently and achieve professional-looking results from the start.
Advanced Features for Experienced Users
Explore advanced features tailored for experienced users‚ such as custom stitch programming‚ specialized presser feet‚ and electronic controls for intricate and precise sewing projects.
9.1 Leveraging Electronic Controls
The Singer E99670 sewing machine offers advanced electronic controls designed to enhance your sewing experience. With an intuitive LCD display‚ you can easily navigate and customize stitch patterns‚ adjust settings‚ and save your favorite combinations. Experienced users can leverage these controls to achieve precise results‚ whether working on intricate designs or heavy-duty projects. The electronic controls allow for seamless adjustments of stitch length‚ width‚ and tension‚ ensuring optimal performance for various fabrics. Additionally‚ the machine’s electronic features enable you to program custom stitches and recall them effortlessly. This level of control empowers users to explore creative possibilities while maintaining efficiency and precision in their projects.
9.2 Using Specialized Presser Feet
Specialized presser feet are essential for achieving professional results with your Singer E99670 sewing machine. These accessories are designed to handle specific fabrics and techniques‚ such as zippers‚ buttonholes‚ and heavy-duty materials. The included presser feet‚ like the zigzag foot and zipper foot‚ provide stability and control‚ ensuring precise stitching. For advanced projects‚ consider optional feet like the walking foot or quilting foot‚ which enhance performance on thick fabrics or large quilts. Always consult the manual for guidance on selecting the right foot for your project. Proper use of presser feet not only improves stitch quality but also prevents fabric slippage and damage. This feature is particularly beneficial for experienced users aiming to expand their creative possibilities while maintaining professional-grade results.

Downloading and Accessing the Manual
The Singer E99670 manual is available for free PDF download on the official Singer website and other online platforms‚ offering quick access to setup‚ troubleshooting‚ and maintenance guides.
10.1 How to Download the PDF Manual
To download the Singer E99670 user manual‚ visit the official Singer website or reputable platforms like ManualsLib or ManualMachine. Search for “Singer E99670 manual” and select the PDF option. Follow the on-screen instructions to complete the download. Ensure you have a PDF reader installed to view the document; The manual is free and easily accessible‚ providing detailed guidance for setup‚ operation‚ and troubleshooting. Additional resources may include quick-start guides or troubleshooting sections. By downloading the manual‚ you’ll have instant access to all the information needed to optimize your sewing machine’s performance and address any issues that may arise.
Warranty Information
The Singer E99670 warranty offers coverage details and duration. Register your product for extended support. For full terms and conditions‚ refer to the manual or Singer’s official website.
11.1 Understanding Your Warranty Coverage
Your Singer E99670 sewing machine is backed by a comprehensive warranty designed to protect your investment. The warranty typically covers defects in materials and workmanship for a specified period‚ ensuring your machine operates efficiently. Coverage includes repairs or replacements for faulty parts and labor under normal use conditions. It’s essential to review the warranty terms to understand what is included and what may be excluded‚ such as damage caused by misuse or unauthorized repairs. To maintain warranty validity‚ keep your proof of purchase and register your product with Singer. For detailed information‚ refer to the warranty section in your manual or visit Singer’s official website. Proper registration and adherence to guidelines ensure seamless support when needed.
11.2 Registering Your Product
Registering your Singer E99670 sewing machine is a simple process that ensures you receive warranty benefits‚ exclusive updates‚ and priority customer support. To register‚ visit Singer’s official website and navigate to the product registration section. You will need to provide your machine’s serial number‚ model number (E99670)‚ and purchase date. Ensure you have your proof of purchase handy for verification. Registration is typically completed online and takes only a few minutes. This step is crucial for activating your warranty and accessing special offers tailored to your sewing machine. Keep your registration confirmation safe for future reference. Registering your product ensures seamless support and enhances your ownership experience.